Ethereum 2.0 Multiclient
DAppNode is a key piece of infrastructure decentralization. Our mission is to make running infrastructure easy for everyone, so we are now introducing multiple clients to validate the Ethereum Consensus Layer
- Current situation
- Technical Aspects
- Start validating from scratch
- Migrate from one client to another
Current Situation
Currently, we are in testing phase. The multiclient validation setup is now available in the Ethereum Prater Testnet, and the objective is to get feedback before releasing Mainnet.
Instructions to validate
Assumptions:
- The user has generated a minimum of one keystore
- A deposit of 32 ETH to the validator account has been made
Previously in Prater tesnet and currently in mainnet (NOT MULTICLIENT):
- The user connects to their DAppNode via Wifi or VPN
- Installs the Prysm package
- Complete the onboarding process where he imports their keystore/s.
- Once the Prysm Beacon Chain is synced and the deposit phase is completed, the validator starts aggregating, attesting and proposing, generating rewards.
Currently in Prater (MULTICLIENT):
- The user connects to their DAppNode via Wifi or VPN
- Picks between their validator client of choice: Prysm, Lighthouse or Teku (Nimbus and Lodestar coming soon)
- With the installation of any client, a 2nd package gets installed:
Web3Signer. This package will hold the keys and avoid having them in two places at the same time - Import the keys into the Web3Signer via the UI of the package
- Once the selected client’s Beacon Chain is synced and the deposit phase is completed, the validator starts aggregating, attesting and proposing, generating rewards.
What is web3signer package and why is required?
The Web3signer is a remote signer that can hold validation keys and communicate with different clients. It comes bundled with a UI that make it easier to import keystores and slashing protection data.
The Web3signer package and its combined use with the client packages is the solution to make it easier and safer for DAppNode users to set up a validator and use multiple clients.
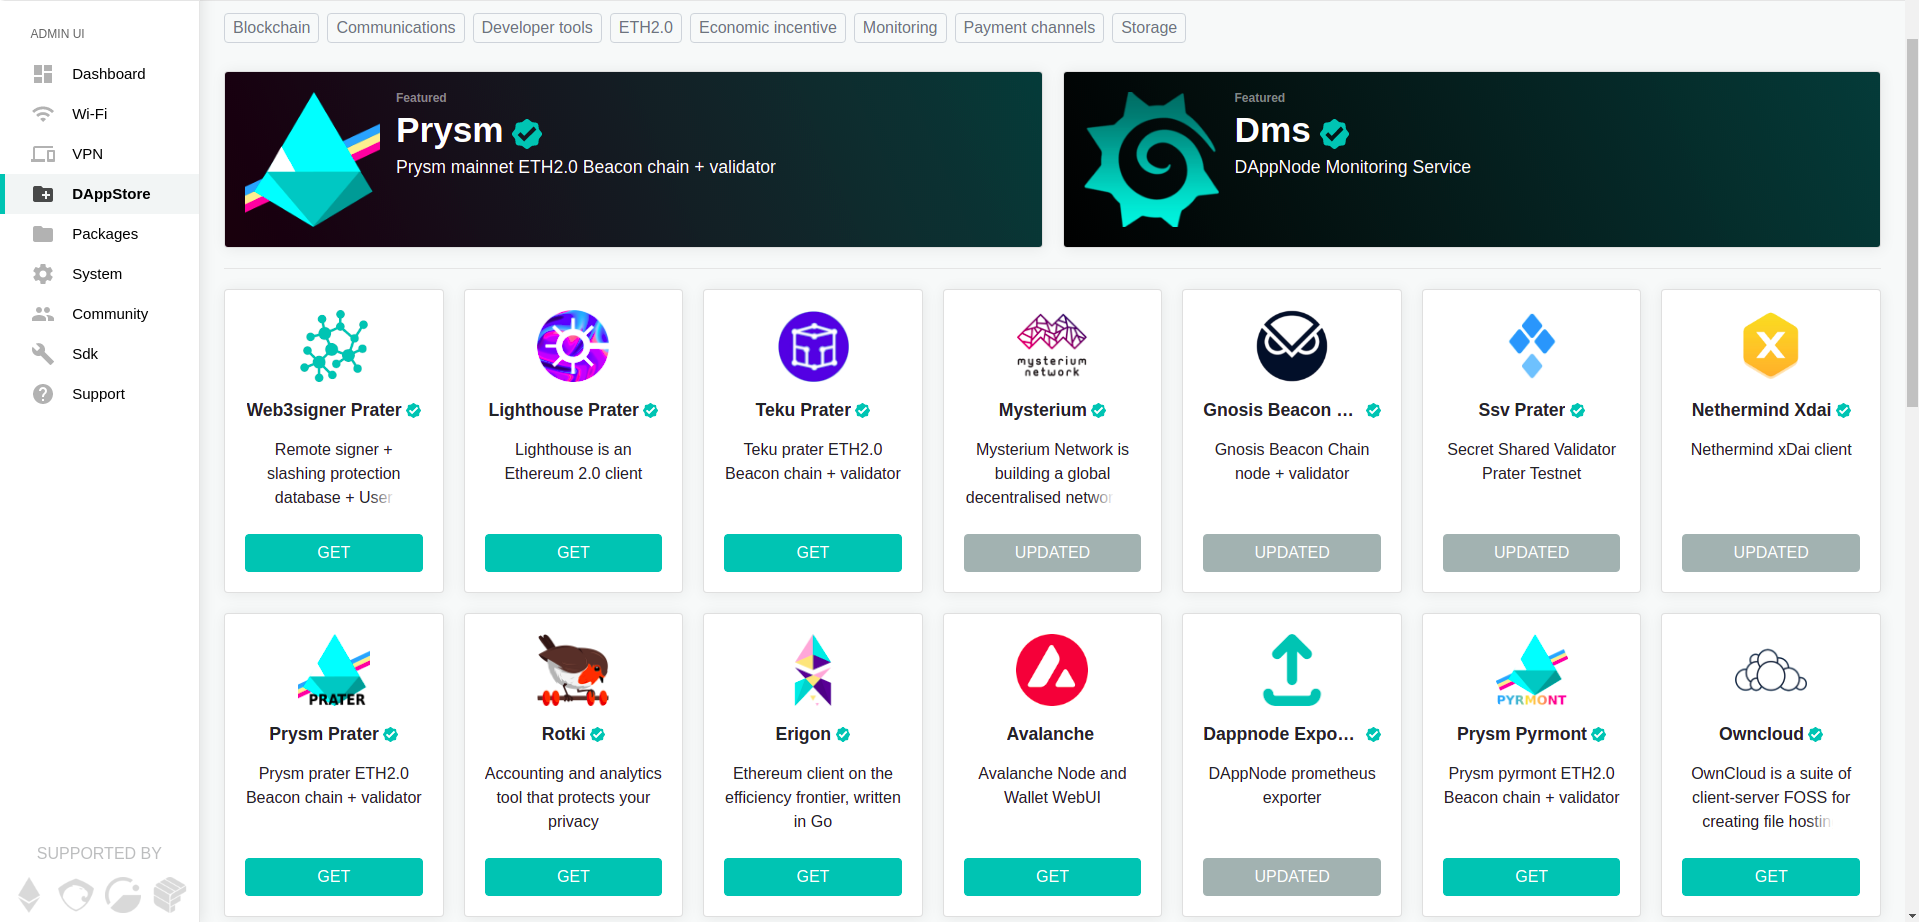
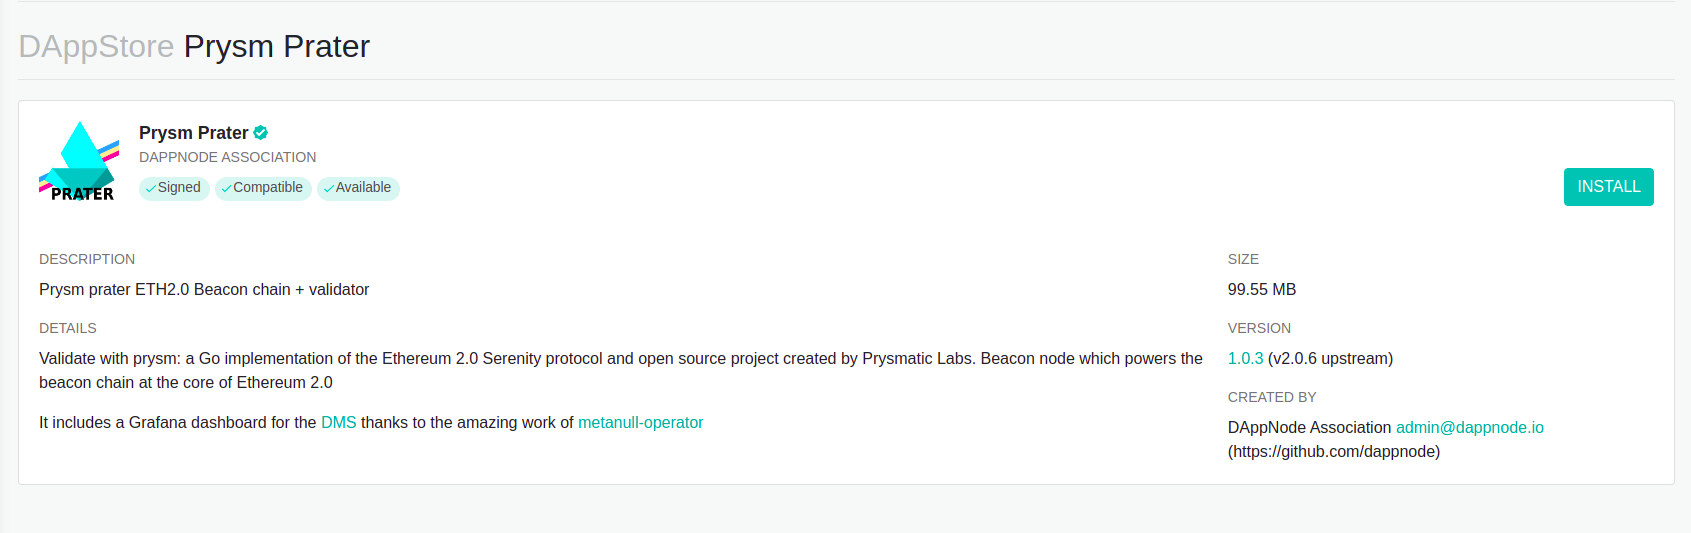
1. Installation a client from scratch
We suppose that you have generated your keystore files. Access your DAppNode via Wifi or VPN and go to the DAppStore and select the ethereum2.0 prater client, you can select some of the next ones:
- Teku
- Lighthouse
- Prysm
Once you have installed the ethereum 2.0 client, you need to set up the web3signer package, what has installed automatically when you have installed some of the previous packages, it’s in the web3signer package where you decide what client you want to use for validating.
1.1 Teku
Once you select the Lighthouse package you will see the next page, then click on the Install button.
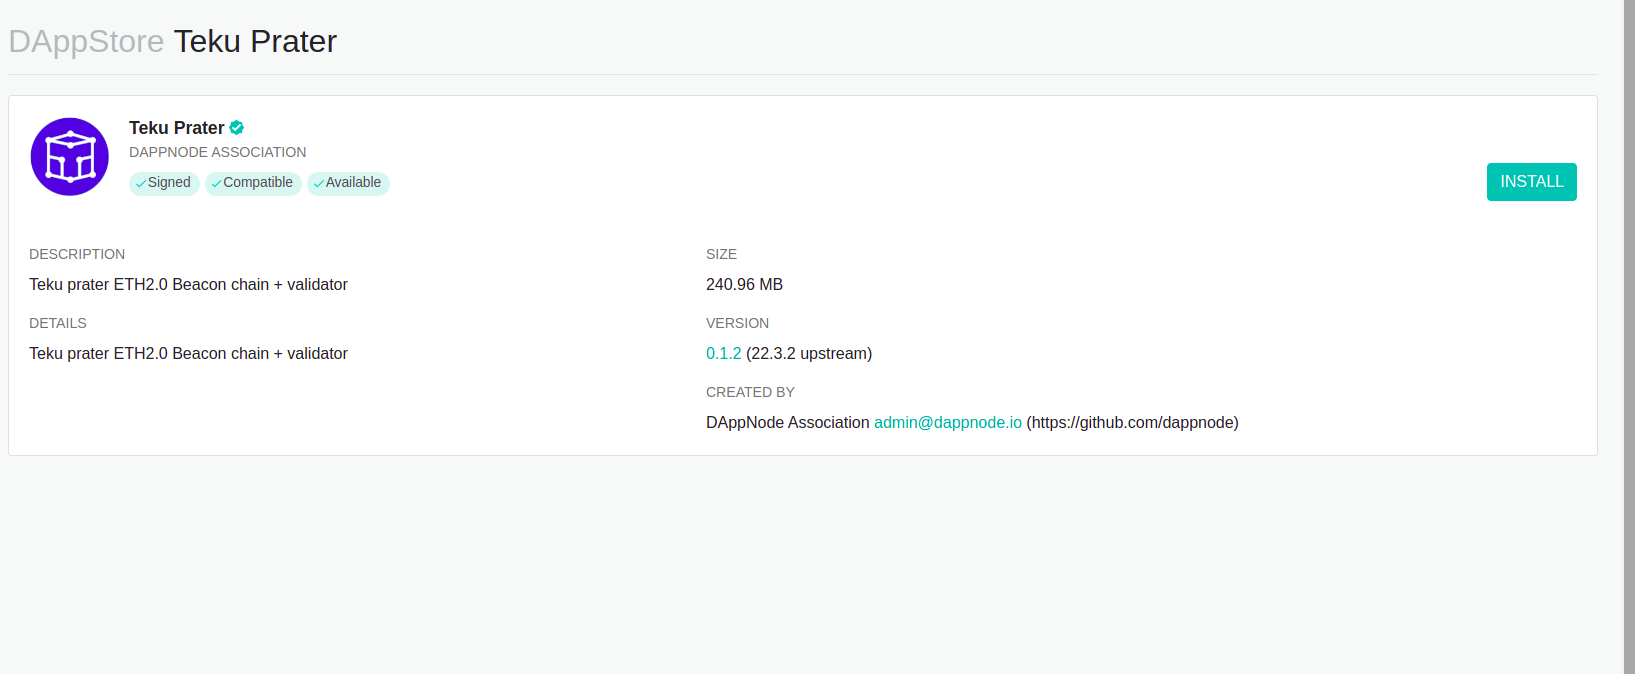
You should fill the next configurations:
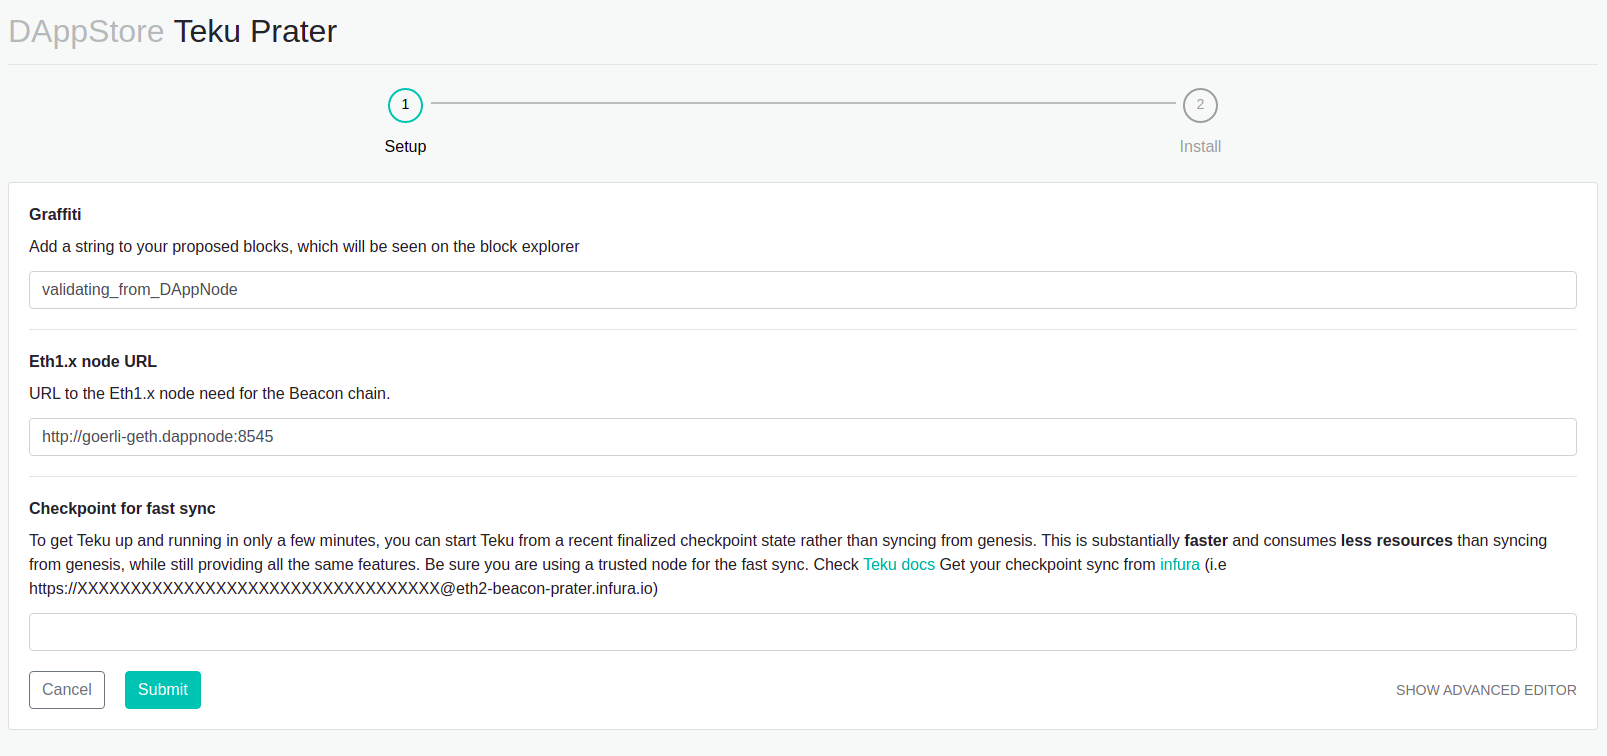
Graffiti: its a mesage you write on the blocks you have created,
Eth1.x node URL: This is prater testnet, you need an endpoint of ethereum goerli testnet
CHECKPOINT_SYNC_URL for fast sync: By default, the package will start to sync from the genesis, if you paste here an URL your node will start to work immediately, and it will download all the chains in the background. Below you have a little guide how to get this url.(We recommend using this option because makes the client works faster. In case you don’t set it up, you need to wait for the client to sync from scratch and that takes time.)
Eth2 client: Select the client you want to use, in this case, Teku.
Click on the submit button, now you have to wait some minutes until the package gets installed.
1.2 Lighthouse
Once you select the Lighthouse package you will see the next page, then click on the Install button.
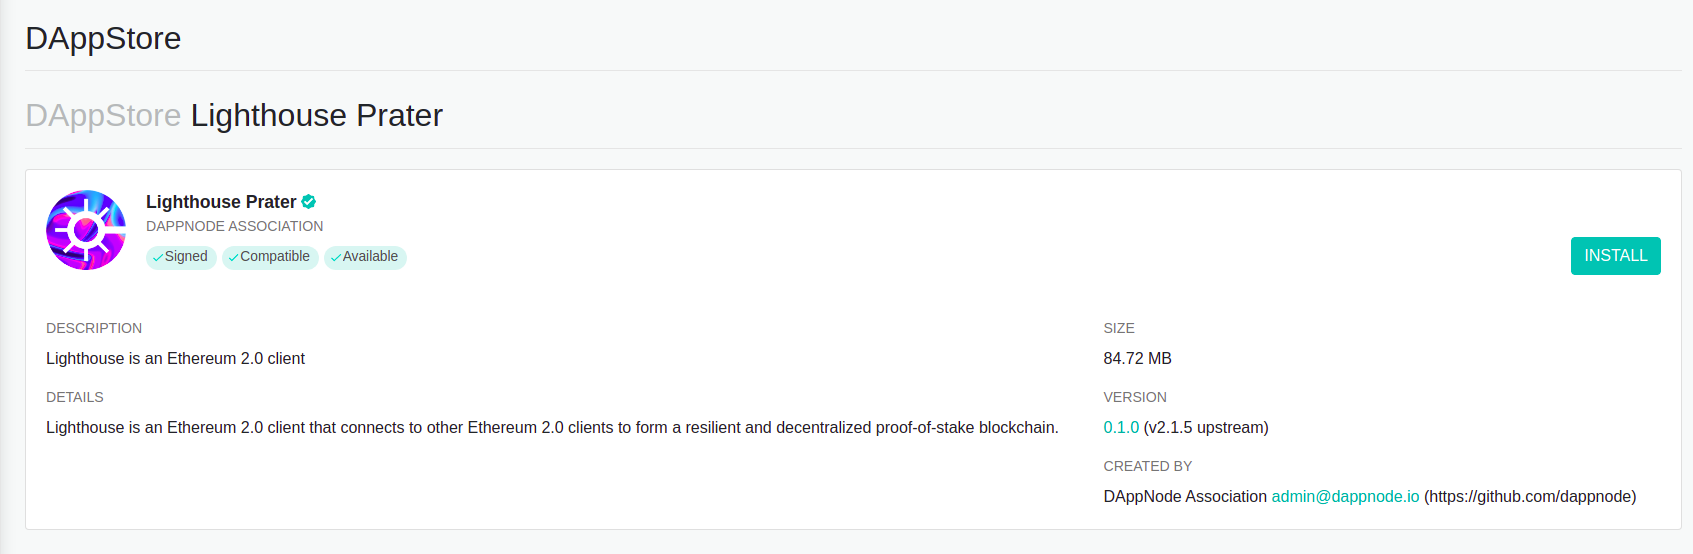
You should fill the next configurations:
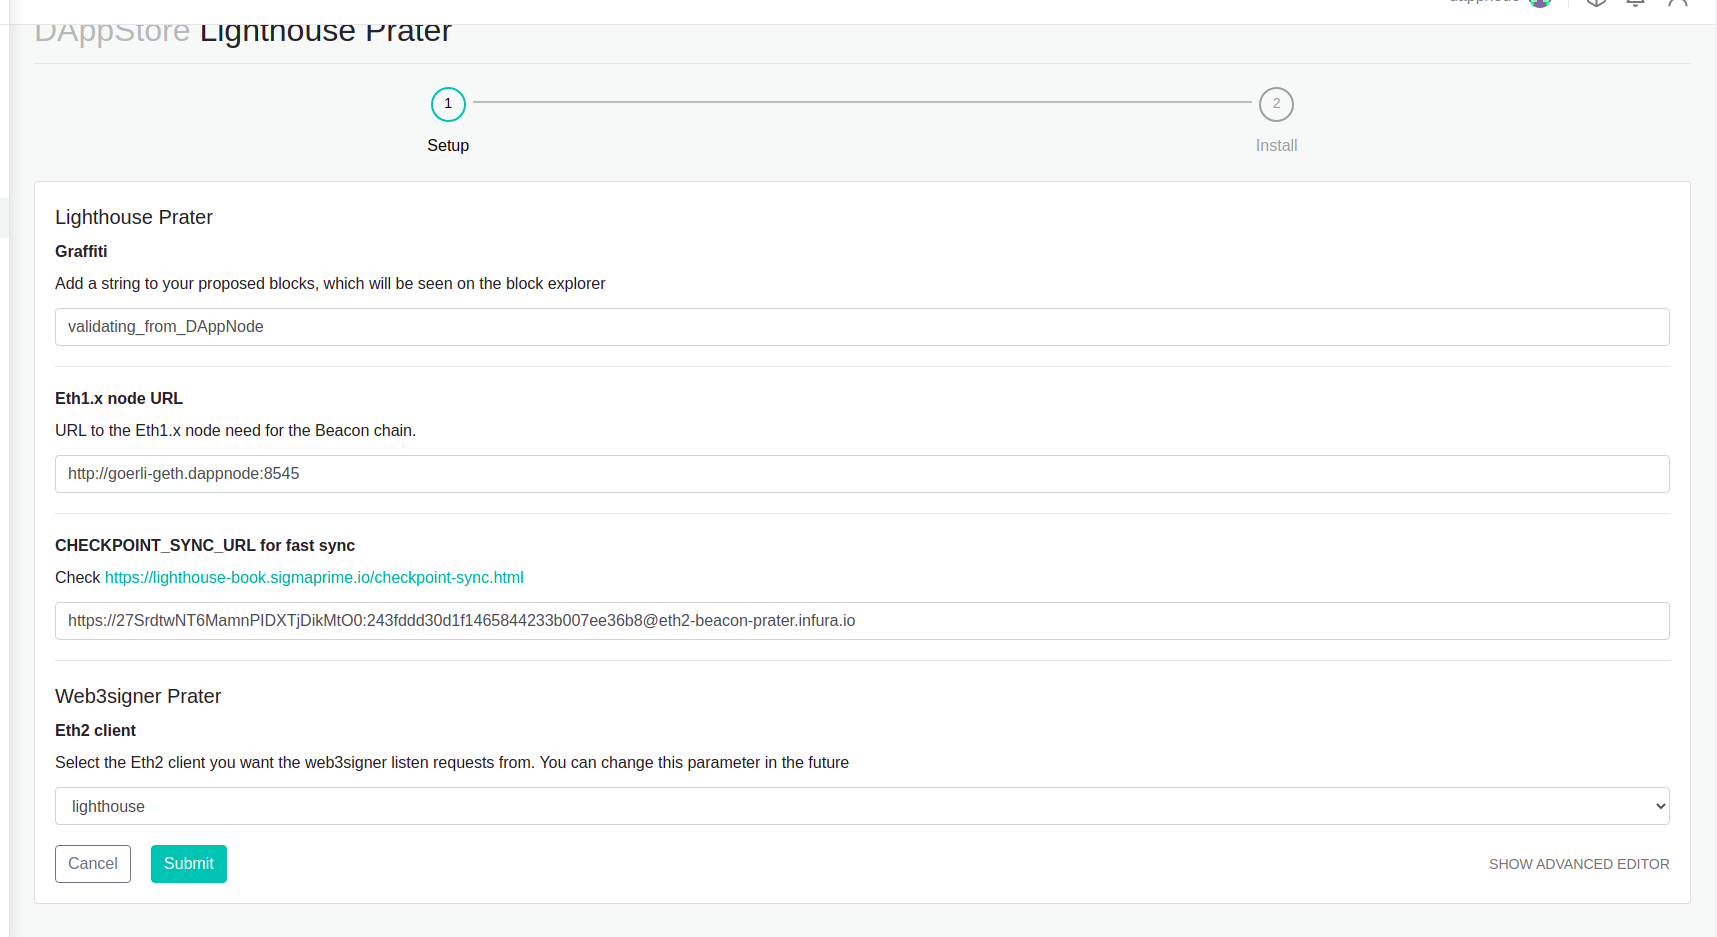
Graffiti: its a mesage you write on the blocks you have created,
Eth1.x node URL: This is prater testnet, you need an endpoint of ethereum goerli testnet
CHECKPOINT_SYNC_URL for fast sync: By default, the package will start to sync from the genesis, if you paste here an URL your node will start to work immediately, and it will download all the chains in the background. Below you have a little guide how to get this url. (We recommend using this option because makes the client works faster. In case you don’t set it up, you need to wait for the client to sync from scratch and that takes time.)
Eth2 client: Select the client you want to use, in this case, Lightouse.
Click on the submit button, now you have to wait some minutes until the package gets installed.
1.3 Prysm
Once you select the Lighthouse package you will see the next page, then click on the Install button.
You should fill the next configurations:
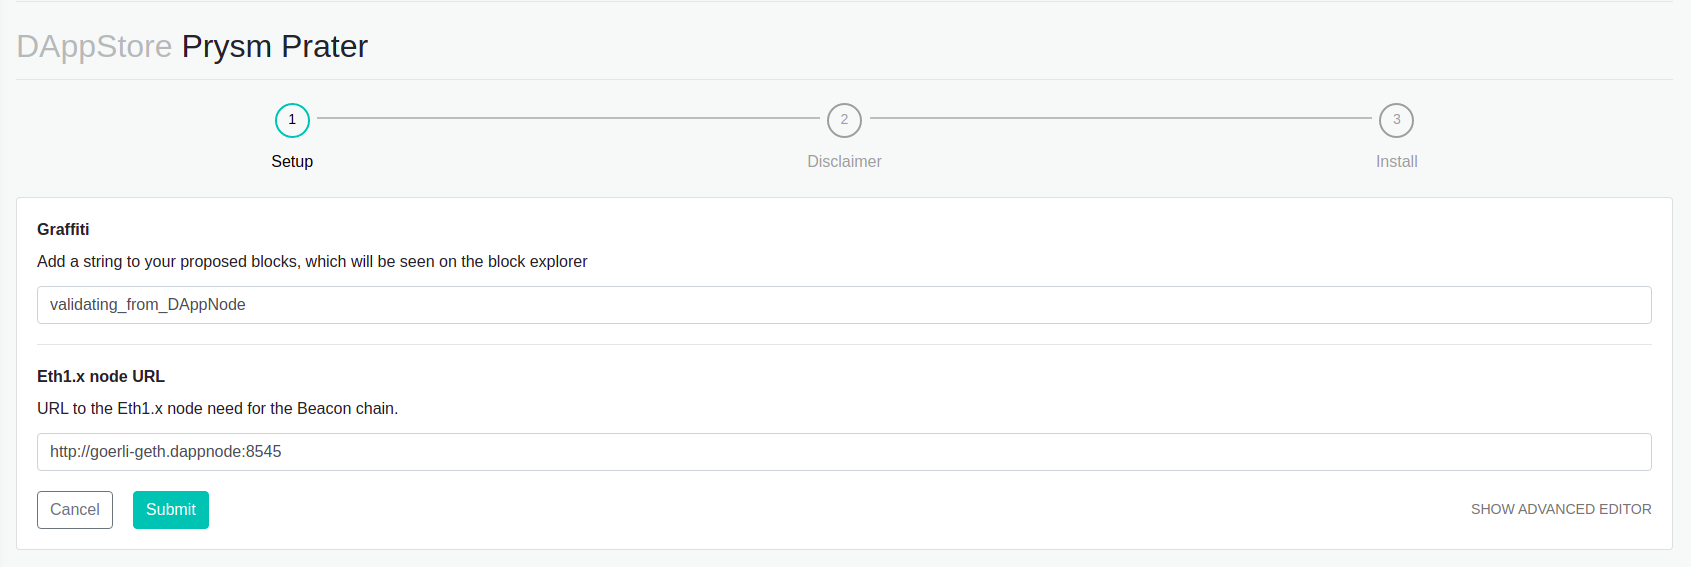
Graffiti: its a mesage you write on the blocks you have created,
Eth1.x node URL: This is prater testnet, you need an endpoint of ethereum goerli testnet
CHECKPOINT_SYNC_URL for fast sync: The prysm package does not have this feature, it’s will be enabled in the next release.
Eth2 client: Select the client you want to use, in this case, Prysm.
Click on the submit button, now you have to wait some minutes until the package gets installed.
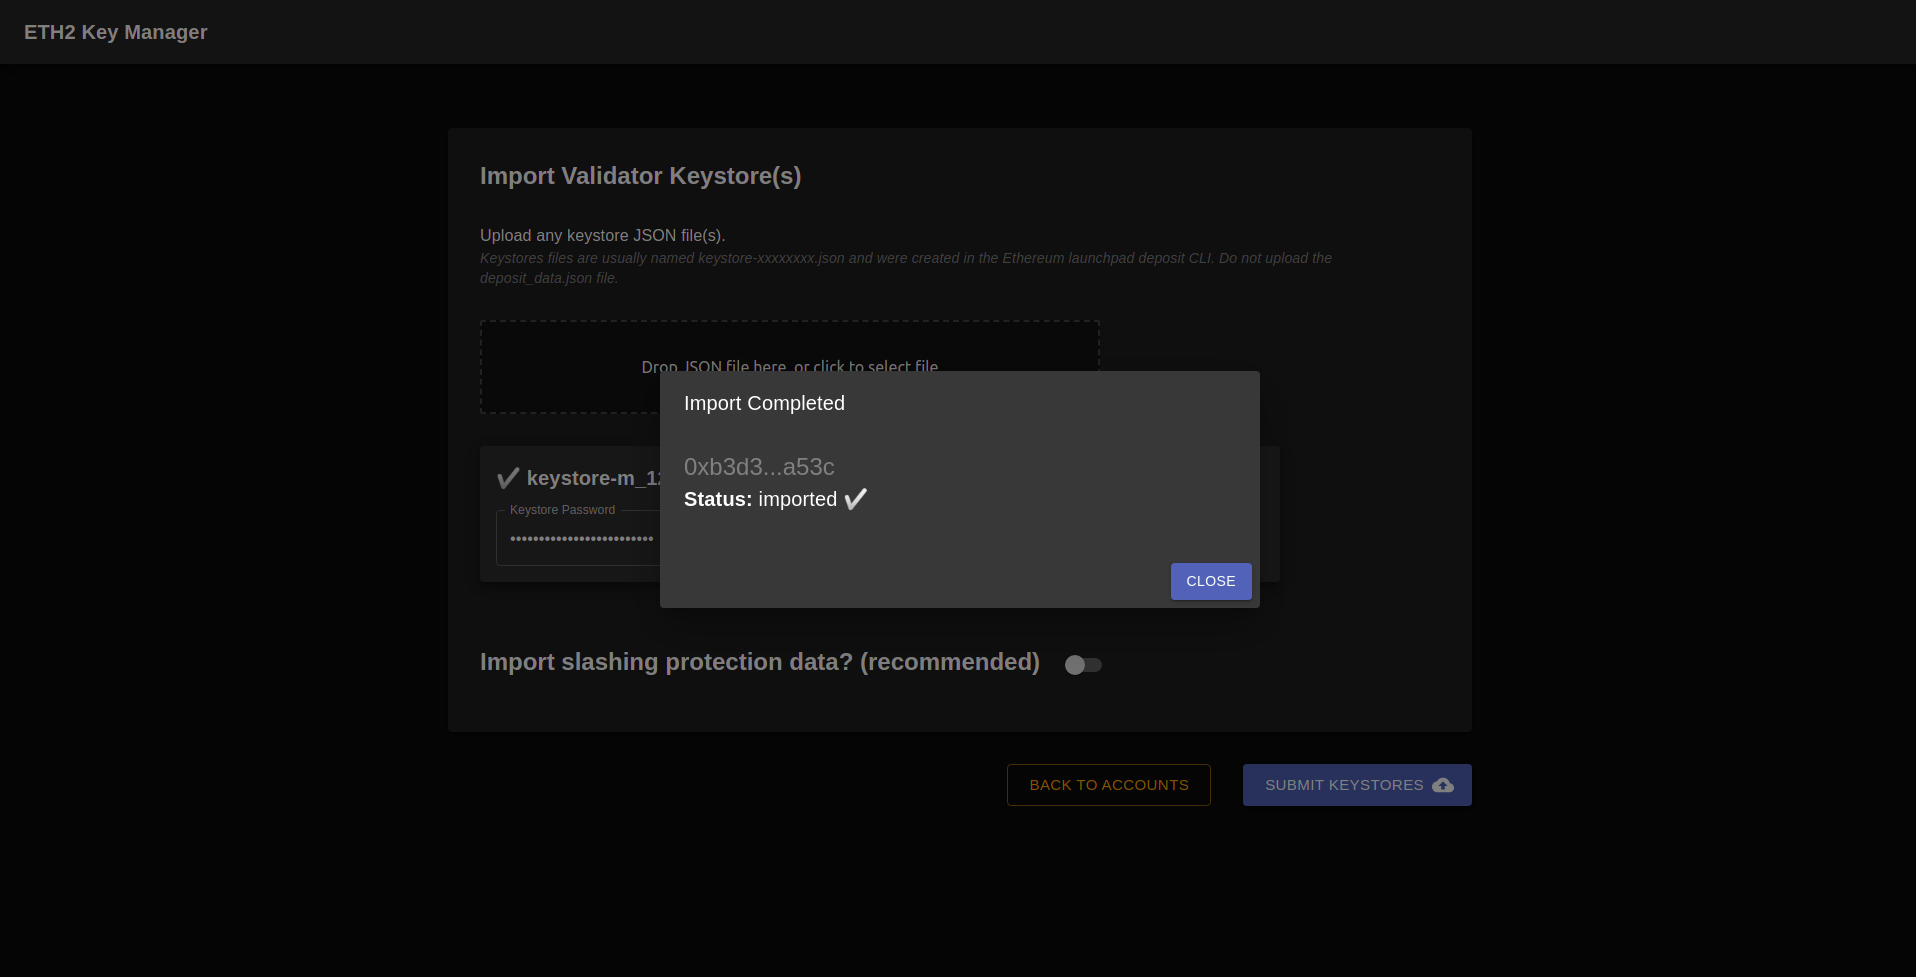
2. Import the keystore files
You will realise that 2 packages have been installed. The package you have selected and another one is called Web3Signer Prater. Click on the last one.

Click on UI link, and you will be redirected to http://ui.web3signer-prater.dappnode/?signer_url=http://web3signer.web3signer-prater.dappnode:9000, and you will see something like this:
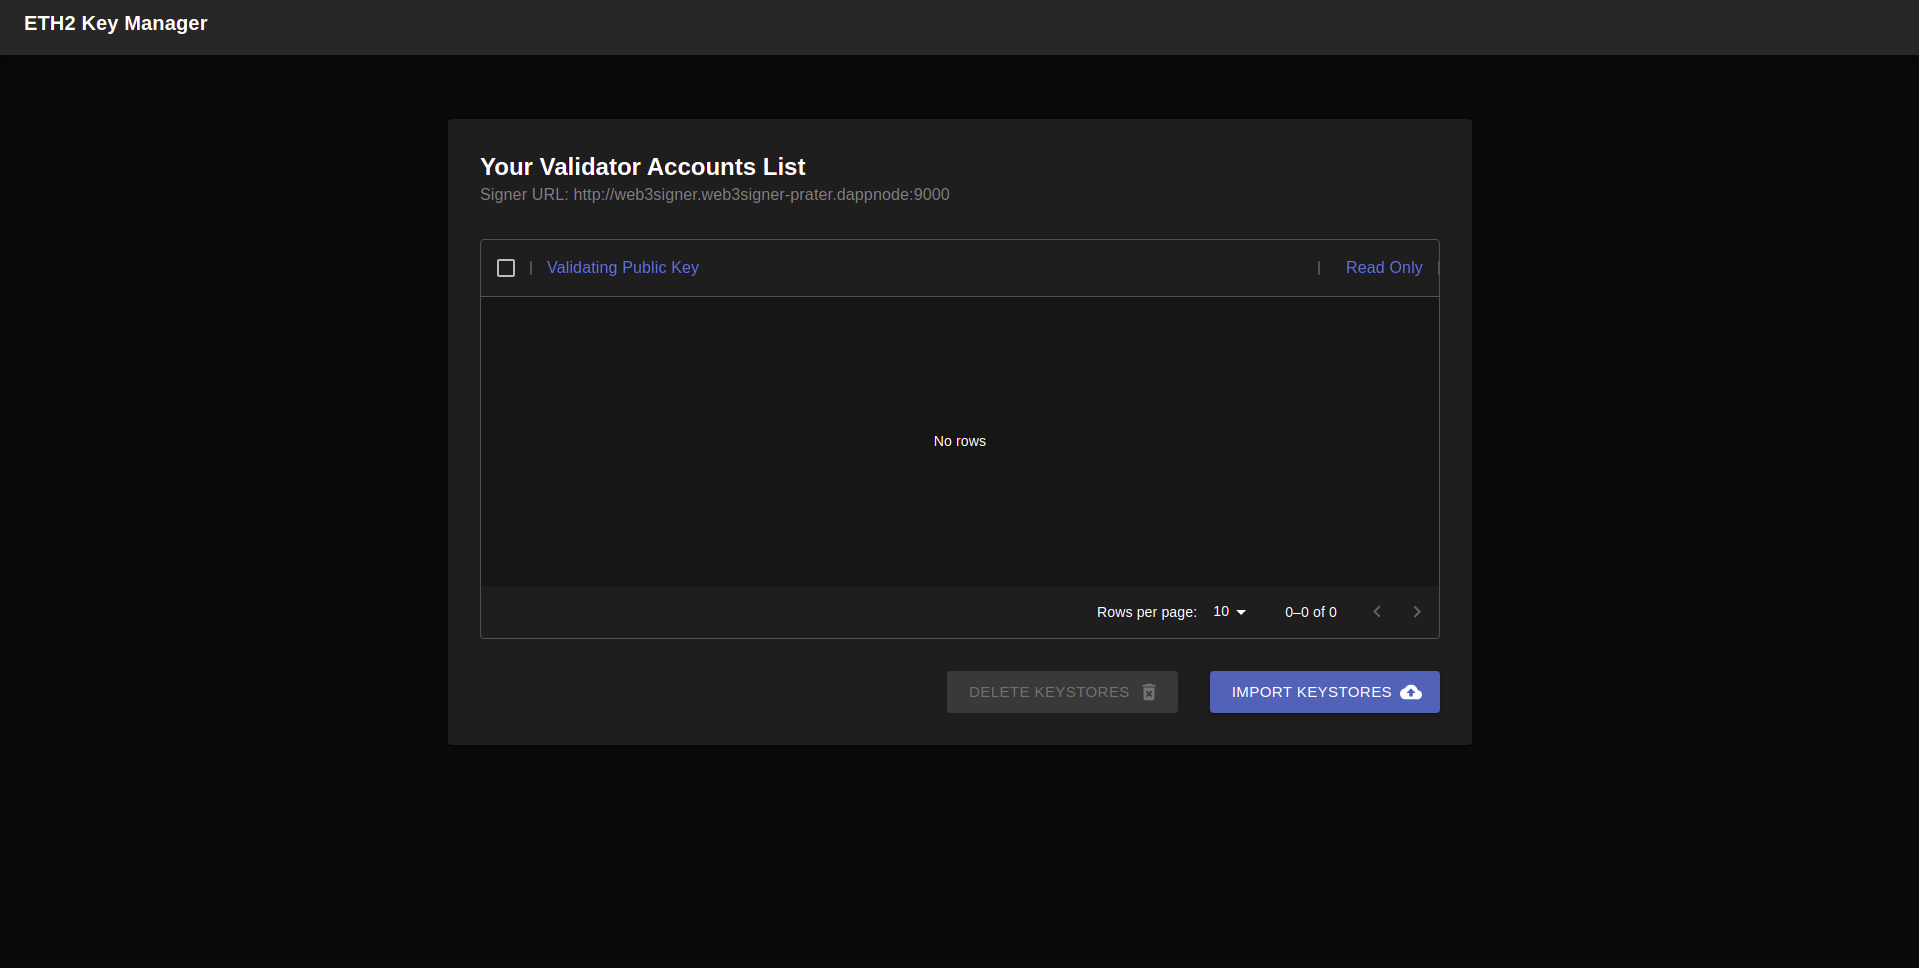
Click on the import Keystores button:
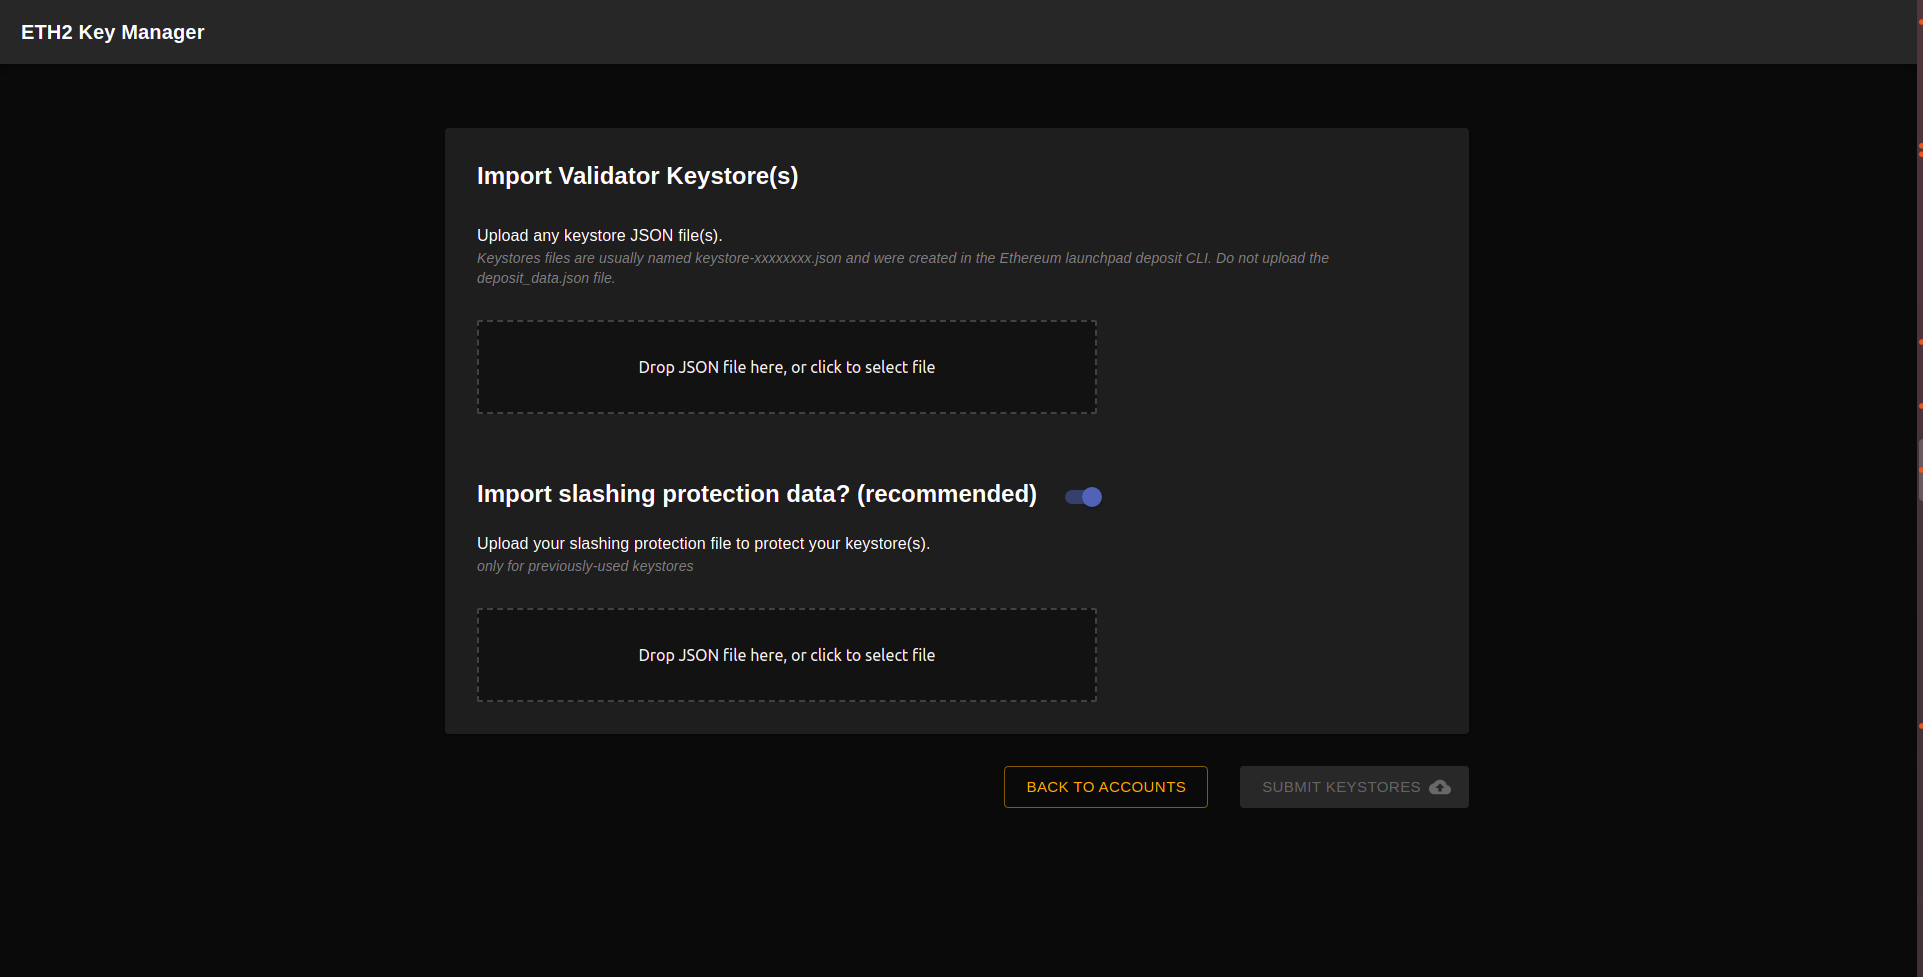
Select your keystore files, if this keystore has not been validated yet, it’s the first time you import the keystores you don’t need to import the slashing protection data. In another case, you need to import the slashing protection data or wait for 2 epochs (30 min) to avoid being slashed.
When you select your keystore, you will be asked for the password you used when you created the keystore files during the keystore generation process.
Finally, click on submit keystores.
3. Metrics
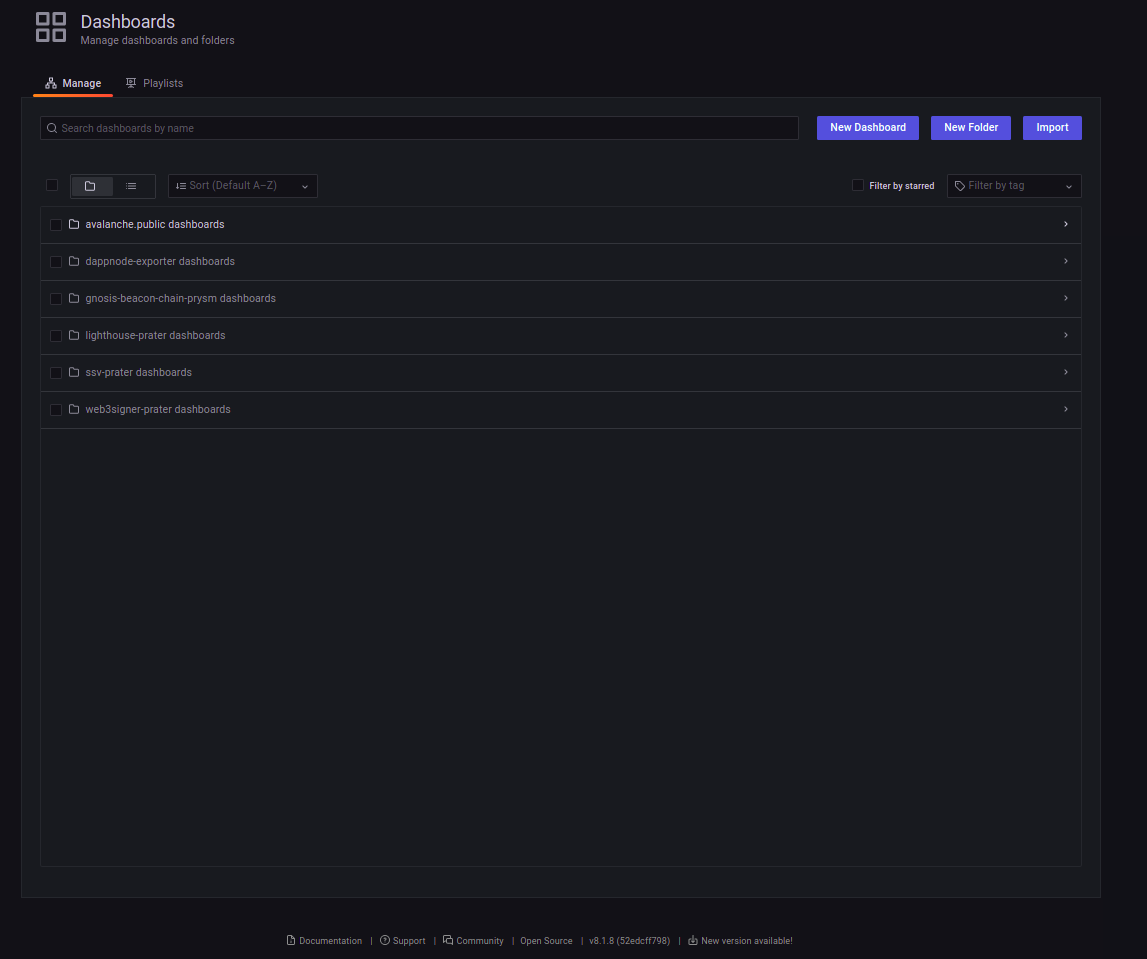
People who have running ethereum validators on DAppNode are used to using the Prysm UI dashboard, but that dashboard does not exist in this infrastructure anymore.
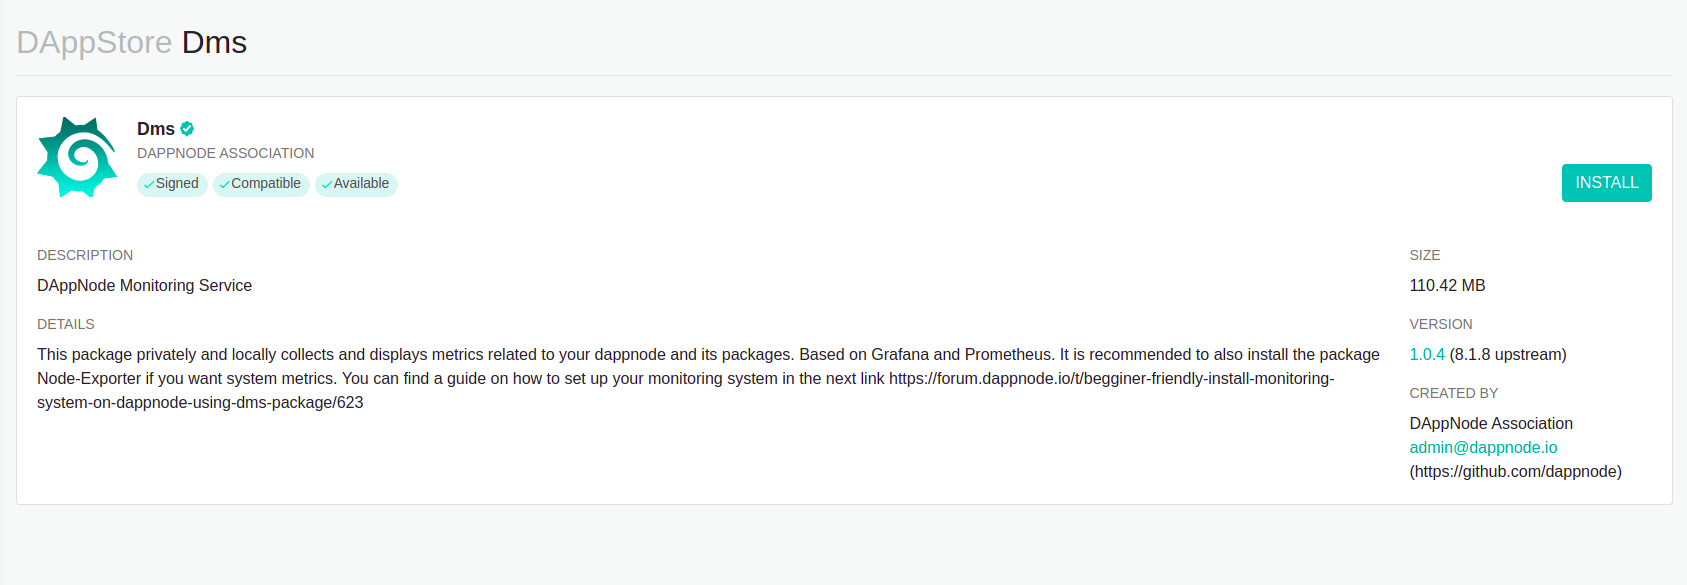
You should install the DMS package to check the performance of your validator and the resources it using and the beaconcha web page to check your validator is attesting.
3.1 Validator Metrics
Firstly, go to the dappstore and install the DMS package, http://my.dappnode/#/installer/dms.dnp.dappnode.eth
When the package it’s installed, go Packages > DMS > click on the UI link (http://dms.dappnode/dashboards/):
Client migration
If you have installed and set up a validator and you want to migrate to another one, the recommended process would be the next one:
- Install the client you want, wait for this client to be synced (please read below for how to speed up the sync process and use less resources)
- Set up the web3signer package to work with this new client
- Check the logs or the DMS metrics to corroborate that it’s working. You can now delete the previous client if you wish.
Example of changing client
In this example we will change from Prysm to Teku.
- First, go to the DAppStore and install the Teku package.
It should pre-populate with the following configuration:
- If you haven’t selected a checkpoint for fast sync (see below how to do it), wait until the Beacon Chain is synced.
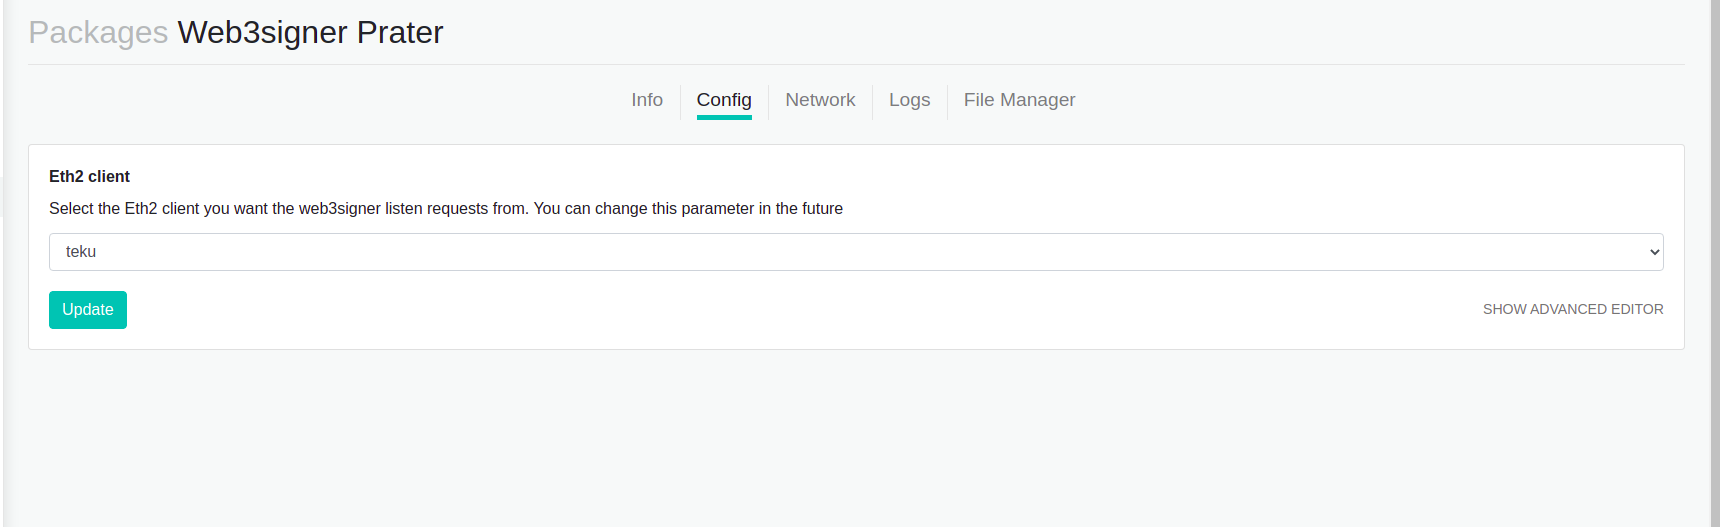
- When this happens, its time to go to the web3signer package, config section and change this parameter to the new client you want to use.
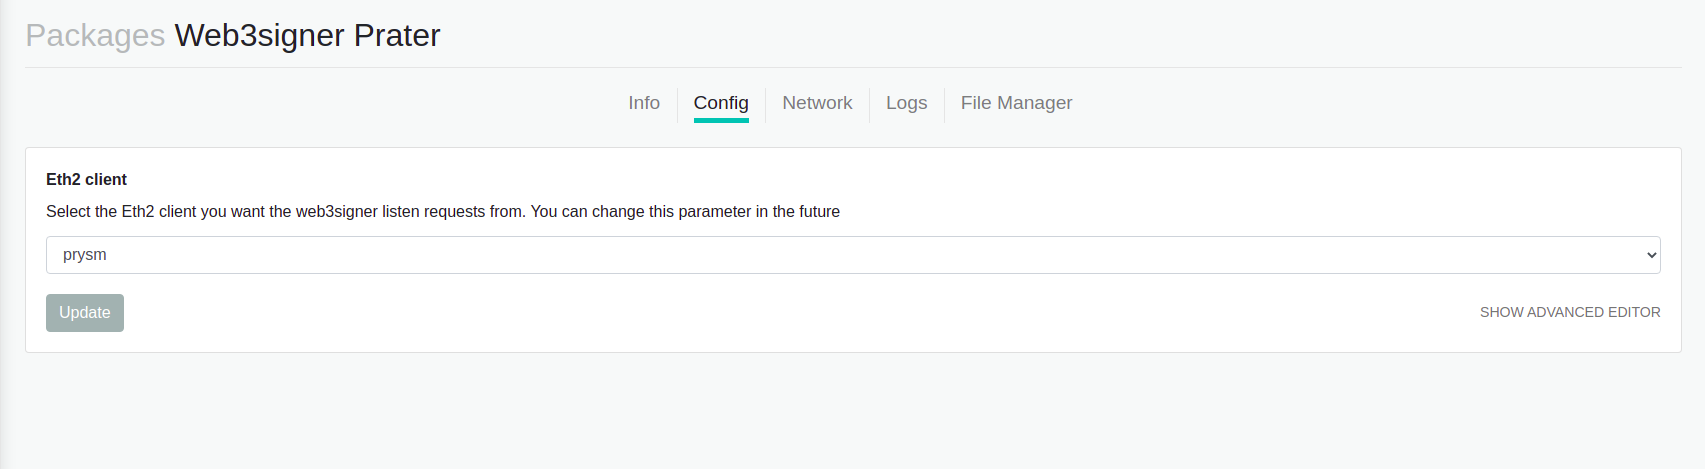
Select the new client and click Update
Fast sync
Fast Sync helps sync the Beacon Chain from a given checkpoint. It reduces resource consumption in your DAppNode and helps sync much faster trading off some trust. If you have an endpoint you can trust, feel free to use. Otherwise, use Infura as per the instructions below, knowing that you are trusting them to serve you the right checkpoint.
- Go to Ethereum API | IPFS API & Gateway | ETH Nodes as a Service | Infura , click on create new project.
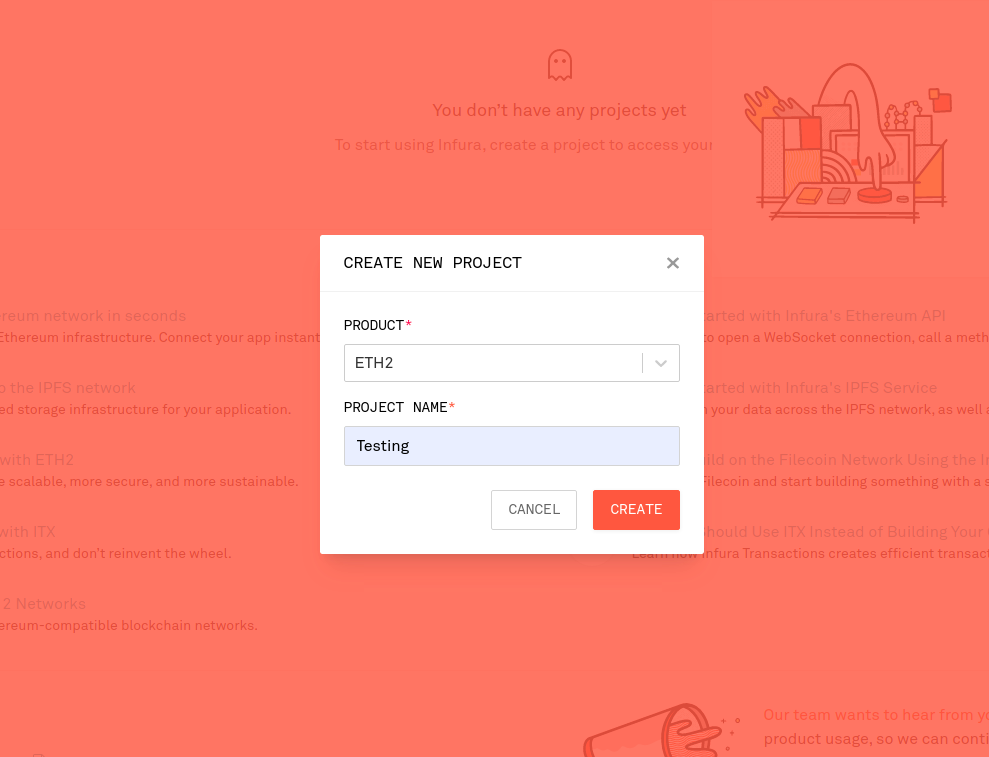
- Select Endpoints Prater and copy the https url. This is the url you should paste in the field.
In this example
https://27SrDMrQXKVvhgDeMZ8rKM9SDjs:8ab895d75879e108d055559e14a4a218@eth2-beacon-prater.infura.io